Equipment Needed
- Creamsource Micro Upgrade Cable (PN: CSS-UPG-CBL) -if upgrading Micro, Sky or SpaceX
- Creamsource Upgrade Cable (PN: CS-UPG-CBL) -if upgrading Mini or Doppio
- Installation Software “Creamsource Upgrade”
- PC Computer running Windows 7 or above
Installing Software
Download the Creamsource Upgrade Utility from the link below. Install the software.
If you are having issues installing the software, see this link
Upgrading Firmware in Creamsource
- Plug the upgrade cable we sent (CSS-UPG-CBL) into the USB port of your PC
- Plug the other end of the Upgrade cable into the ACCESSORY port on the back of the Creamsource, and make sure the Creamsource is powered up
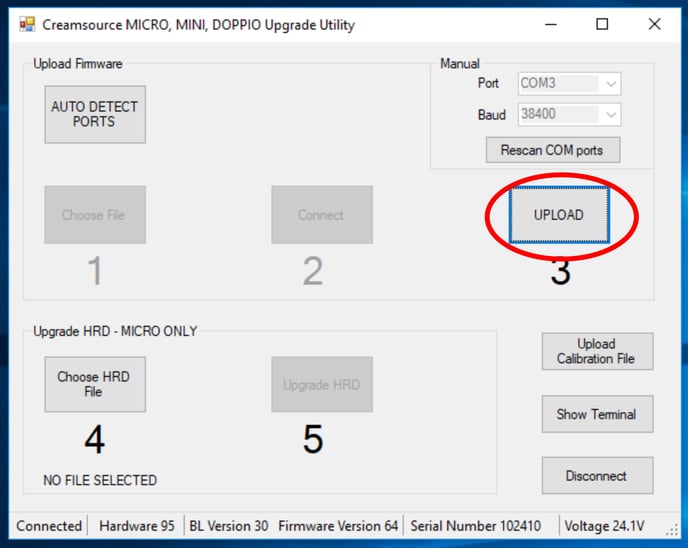
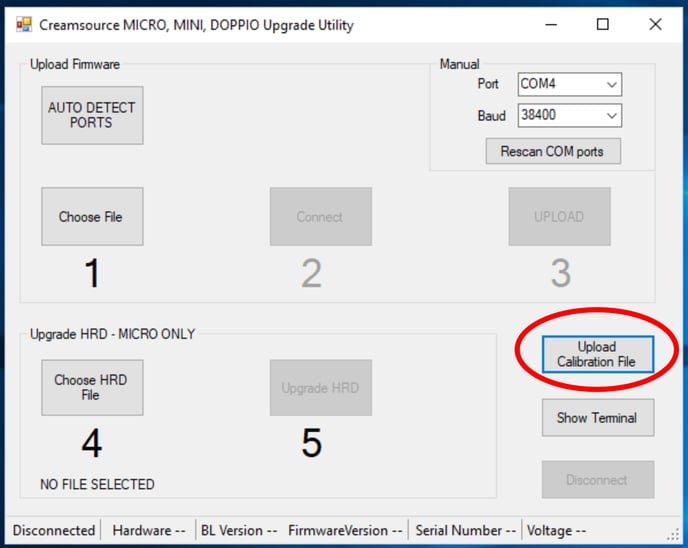
- Run the Creamsource Micro Upgrade application, you should see the following screen appear. Press AUTO DETECT PORTS
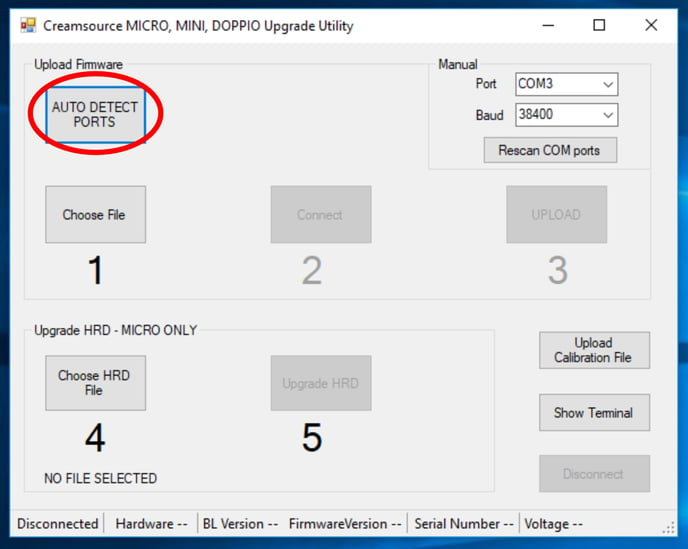
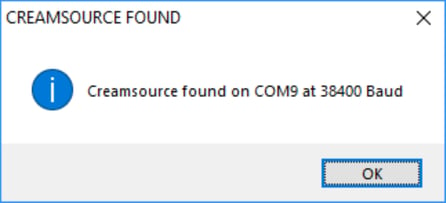
-
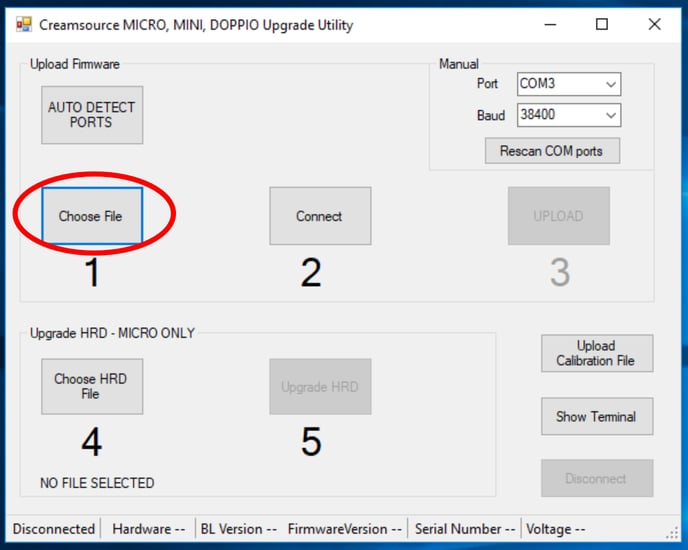
Press Choose File and in ‘Firmware Upgrade Folder\latest firmware’ select the firmware file to upload.
For Micro: cs_95_MICRO_Vxx.upg
For Micro Colour: cs_95_MICRO_COLOUR_Vxx.upg
For Mini or Doppio: cs_95_DOPPIO_MINI_Vxx.upg
For Sky or SpaceX: cs_150_SKY_SPACEX_Vx-x-x.upg
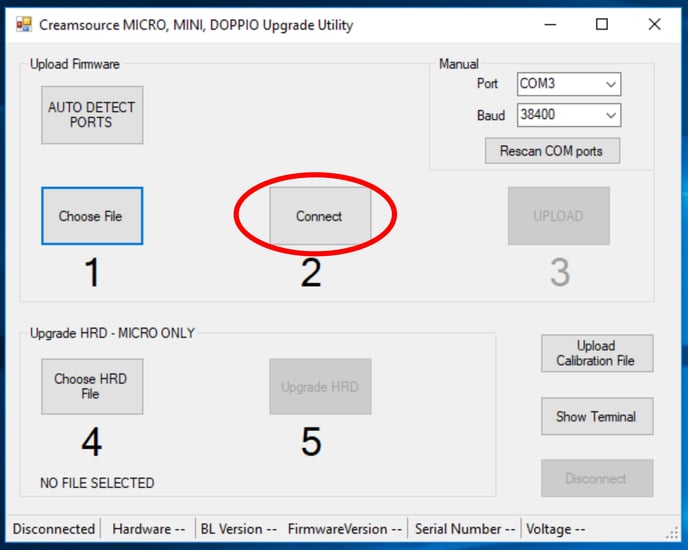
- Click the Connect button – the Creamsource should display “WAITING FOR UPGRADE” on the LCD display.
- Click the UPLOAD button, and if asked to proceed by User Account Control click YES.
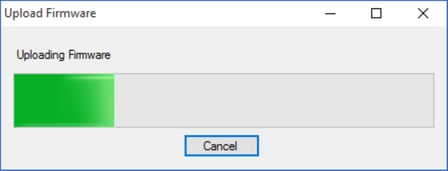
After this the fixture should reset. If you are upgrading a Mini, Doppio, Sky or SpaceX, you are now done!
Please Note: If upgrading a Micro (Bender or Colour) -you also need to do the next step and upgrade the HRD (High Resolution Dimming) unit -wait until the unit has finished rebooting before proceeding.
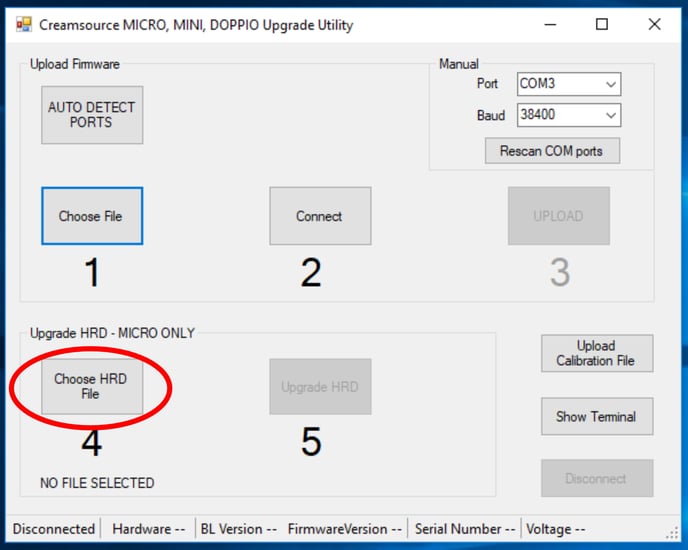
Upgrading HRD Firmware [Creamsource Micro Only]
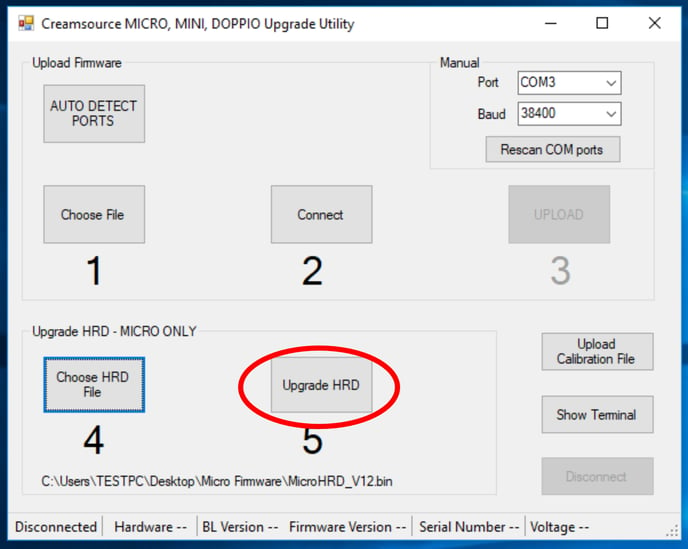
- Click the Choose HRD File button and select the HRD firmware
For Micro: HRD_MICRO_Vxx.bin
For Micro Colour: HRD_MICRO_COLOUR_Vxx.bin
- Click Upgrade HRD and wait for Success message box to appear.

Congratulations! You’re good to go!
It is a good idea to go to MENU->ADVANCED->Restore Defaults before using the unit, to make sure any new features are initialised correctly.
Uploading Calibration File after LED Engine Upgrade
This section only applies if you have upgraded the LED boards in a Bender unit - you will need to upload a new calibration file as described below.
If you are just upgrading the firmware, with no hardware changes - please ignore this section!
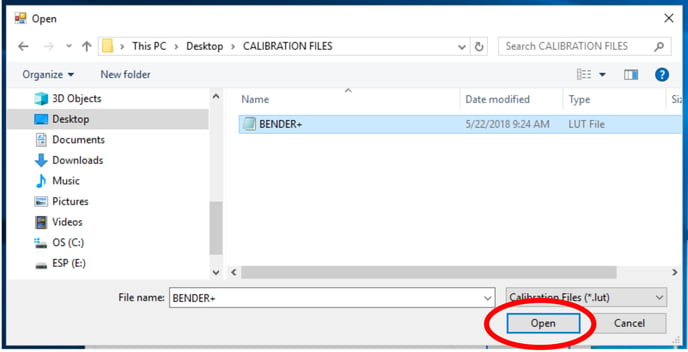
- Press ‘Upload Calibration File’ button, and choose “*.lut” file supplied with the LED engine upgrade package. For upgrades to Mini+ and Doppio+ units this will be named: BENDER+.lut
- Press OPEN and wait for the upload to complete -this will take around 10 seconds
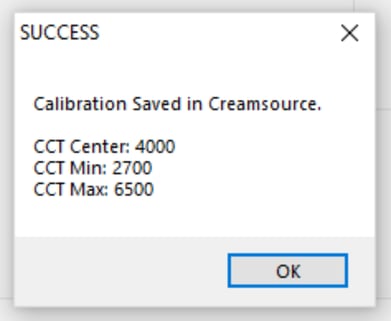
- When the upload is complete you will see a ‘SUCCESS’ message box
- The unit is now calibrated and can be powered off
Troubleshooting
|
PROBLEM |
SOLUTION |
|
The COM port of the USB adapter is not shown in the drop down box of the Upgrade Software |
The USB adapter needs to be plugged in and recognised BEFORE the Upgrade software is started. |
|
Nothing happens when you click Connect |
The wrong COM port is selected. Try a different COM port, or pressing ‘AUTO DETECT PORTS’ Creamsource is not turned on Cable is not plugged into Creamsource or PC Try re-powering the Creamsource, and restarting the software and try again |
|
Upload stalls and will not complete |
Try re-powering the Creamsource, and restarting the software and try again |
|
Creamsource shows ‘FIRMWARE DAMAGED’ after upload |
Try re-powering the Creamsource, and restarting the software and try again |
|
Error message ‘INCOMPATIBLE CALIBRATION FILE’ when uploading calibration into Bender |
Ooops! Seems like we’ve given you the wrong file. Please contact Outsight Support with the error message and we’ll help you out |
|
Creamsource still shows ‘UPGRADING FIRMWARE…DO NOT TURN OFF’ after upgrade has completed |
Sometimes an upgrade will fail, and will need to be re-tried. Try re-powering the Creamsource, and restarting the software and try again (the Creamsource will not be damaged if you turn off) |
|
Creamsource gets stuck on the "Outsight Logo" or keeps resetting |
Try forcing into bootloader mode by holding down the < and > keys (Menu and On/Off) while powering up the unit. It should display "WAITING FOR UPGRADE". Try updating again now. |