How to upload Calibration File to Vortex
If the error message "FIXTURE NOT CALIBRATED" is displayed during startup, follow these steps to upload the calibration file back into the fixture.
Each Vortex unit is individually calibrated at the factory to ensure colour consistency and accuracy. If for some reason the calibration data on the fixture gets corrupted, it is possible to upload the calibration data back into the fixture.
To connect to the fixture you will need to use a USB Type A male to male cable, an example of such cable is found here: Pearstone USB 3.0 Type A Male to Type A Male Cable - 6'
Steps for installing:
- Download and run the calibration software - Creamsource Calibrator v1.2.9
Steps for Connecting to a Vortex:
- Connect Vortex to PC using USB 'A' male to male cable
- Power on Vortex, wait for it to boot (The USB cable should be connected BEFORE connecting power)
- Press "Auto Detect Vortex" button, it should find it and fill in the SN field
Steps for uploading calibration to your unit:
- Connect to Vortex as above
- Press "Restore Calibration"
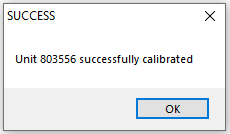
- It takes some time to do the calibration - you should get a 'success' message when done

- It is safe to turn off unit now and unplug USB cable