Enter the Effects menu by pressing the 'FX' quick-key and select one of the following presets. Each preset has multiple parameters that can be changed to customise the effects.
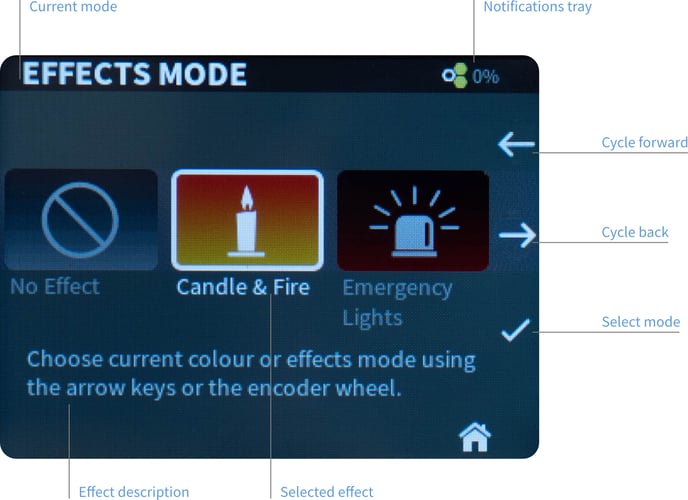
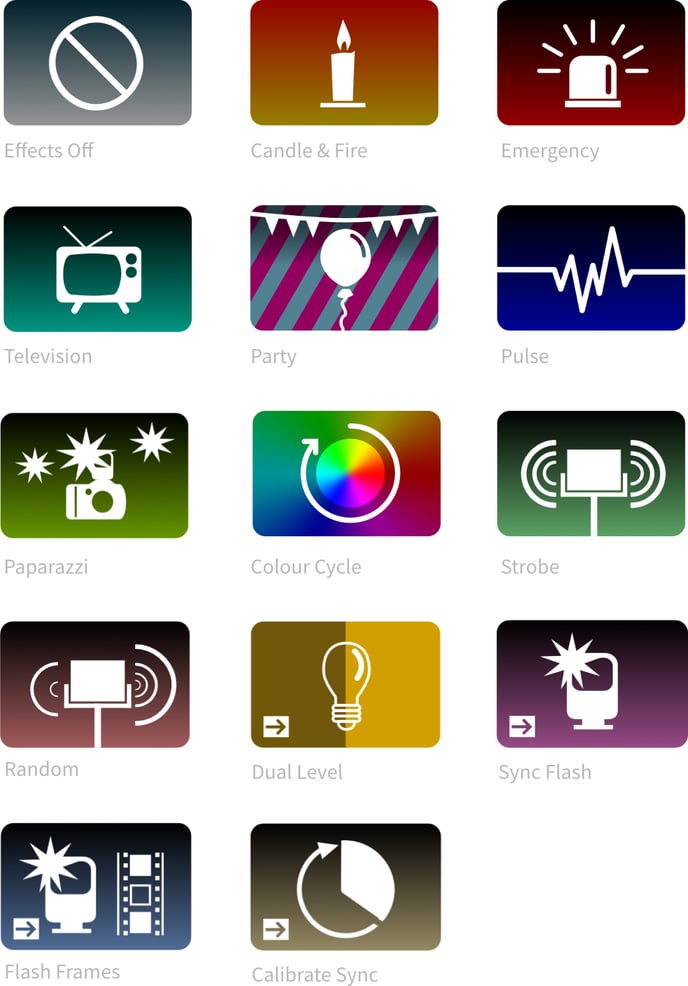
Effects modes available:

This icon is displayed on effects that require an external sync source.
Description of Effects and Parameters
Effects Off
This is the default setting and will turn off any effects. You can also turn off effects by holding down the 'FX' button on the home screen.

Candle & Fire
Realistic candle and firelight effect with control over preset, intensity, speed and colour.

|
SETTING |
RANGE |
DESCRIPTION |
|
PRESET |
1-8 |
Choose from presets that closely mimic various fire effects. 1 Custom / 2 Calm Candle / 3 Windy Candle / 4 Fireplace / 5 Campfire / 6 Bonfire / 7 Inferno / 8 Gas Fire |
|
INTENSITY |
0-100% |
Intensity of effect (amount brightness can vary by) |
|
SPEED |
0-100% |
Speed that the effect will flicker |
|
COLOUR |
1400-5600k / Custom |
The colour temperature of the effect. If set to Custom, can use any colour set in Colour Mode screen. |
Emergency
Emergency lights such as police and ambulance with control over preset, colour, flashes, speed and pause time.

| SETTING | RANGE | DESCRIPTION |
|
PRESET |
1-14 |
Choose from presets that will save time for setting up. If set to Custom, can use any colour set in Colour Mode screen. |
|
COLOUR |
1-13 |
Preset colours used for the effect |
|
FLASHES |
1-20 |
Number of flashes of each colour |
|
SPEED |
0-100% |
Speed of the effect |
|
PAUSE TIME |
0-2000ms |
Pause duration between each flash |
Television
Changes CCT and green/magenta to simulate light cast by TV screen, with control over speed, dynamic range and CCT.

|
SETTING |
RANGE |
DESCRIPTION |
|
SPEED |
0-100% |
Speed of effect |
|
DYNAMIC RANGE |
0-100% |
Dynamic range of effect (amount brightness can vary by) |
|
CCT |
2200-10000k |
Base CCT for the effect |
Party
Dynamic colour changing party lights with control over palette, speed, transition type and transition speed.

| SETTING | RANGE | DESCRIPTION |
|
PALETTE |
1-9 |
Choose colour palette from the following PRIMARY 6 / PRIMARY 12 / PRIMARY 24 / WARM / COOL / WARM & COOL / PASTEL / PURPLE RAIN / ULTRAVIOLET |
|
SPEED |
0-100% |
Speed of the effect |
|
TRANSITION |
1-3 |
Change the way the effect will transition between colours |
|
TRANSITION SPEED |
0-100% |
Speed of the transition |
Pulse
Pulse of light fading in and out with control of frequency and pulse speed.

|
SETTING |
RANGE |
DESCRIPTION |
|
FREQUENCY |
0-100% |
How often the effect will display |
|
PULSE SPEED |
0-100% |
The speed the pulse effect |
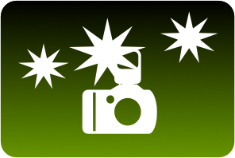
Paparazzi
Random camera flash-bulb effect with control of speed, decay speed and CCT.
| SETTING | RANGE | DESCRIPTION |
|
SPEED |
0-100% |
Speed of the effect (interval between flashes) |
|
DECAY SPEED |
0-100% |
How quickly the flash fades |
|
CCT |
1700-15000k / Custom |
Base CCT for the effect |
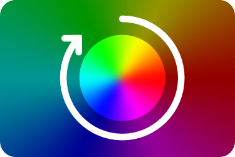
Colour Cycle
Cycle through the spectrum of saturated colours with control over speed.
|
SETTING |
RANGE |
DESCRIPTION |
|
SPEED |
0-100% |
The speed the colour cycling |
Strobe
Strobe effect with control over frequency, brightness & duty cycle.
|
SETTING |
RANGE |
DESCRIPTION |
|
FREQUENCY |
0.1-50Hz |
Frequency of strobe effect |
|
DUTY CYCLE |
1-99% |
The ratio between light OFF and ON times |
Random
Create a random pattern of flashes with control over frequency, length & variation.
|
SETTING |
RANGE |
DESCRIPTION |
|
FREQUENCY |
0.05-5.0Hz |
Frequency of random effect |
|
LENGTH |
2-200ms |
Maximum length of any flash |
|
VARIATION |
0-100% |
The amount of variation allowed from the effect |
Dual Level
Set two different light levels and instantly switch between then using Flash button, DMX or external trigger signal.

|
SETTING |
RANGE |
DESCRIPTION |
|
FLASH LEVEL |
0-100% |
Light output when FLASH button pressed on the control panel |
Sync Flash
Used to create flashes of a defined duration, similar to a Studio Strobe light. A modelling level can also be set. The flash can be triggered by pressing the Flash button, DMX or by an external trigger signal such as a camera hot shoe.
|
SETTING |
RANGE |
DESCRIPTION |
|
FLASH LEVEL |
0-100% |
Light output when FLASH triggered |
|
FLASH TIME |
1/5000th - 1/5th sec |
Duration the light is flashed ON for |
Flash Frames
Use this mode to create flashes tightly synchronised to the camera shutter. Must be used in conjunction with a sync source such as Creamsource Flashbandit, or Genlock output of camera.
The duration of the flash ON and OFF is specified in Frames - e.g. Flash 1 frame ON, followed by 3 frames OFF, repeat. The Frame Offset is useful if using this effect with multiple fixtures, so they can respond to different frames.
If using this effect with multiple fixtures, you should disconnect the sync cable and re-connect it after changing settings such as Frames On, Off or Offset. This ensures the internal counters are reset, so the fixtures will flash in the expected pattern.
|
SETTING |
RANGE |
DESCRIPTION |
|
OFF LEVEL |
0-100% |
Brightness for the OFF frames |
|
FRAMES ON |
1-255 |
No. of frames to flash ON |
|
FRAMES OFF |
1-255 |
No. of frames to flash OFF |
|
OFFSET |
0-255 |
No. of frames to offset the sequence by, from first frame received |
Calibrate Sync
This is a special mode used for calibrating the light to an external sync source, such as the FlashBandit sync box. It is used to make sure the camera shutter and Vortex8 are synchronised, to prevent the flash-banding effects when shooting on a CMOS sensor camera or when using frame synchronised effects such as Flash Frames.
|
SETTING |
RANGE |
DESCRIPTION |
|
SYNC PHASE |
0-360 |
Change the phase offset of the camera sync input. Adjust until the flashing light cannot be seen in the camera monitor. |
Ensure that you setup a camera sync signal that is connected to the Accessory port. See Camera Sync for a more detailed process of this setup.